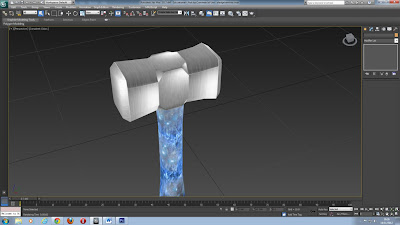
Create a cylinder
Height: 16
Radius: 4
Parameters- change the sides to 10- if there’s no change
then do this in the modify tab and change the sides in there instead
Press F4 to see the edges
Turn the height segments down to 3 and the cap segments down
to 1
Drag the X axis (red line) inwards to make it look more like
the handle of a sledgehammer
One done- right click
and convert to editable poly
Go into edge mode- red triangle icon and select one of the
lines going around the shape- click loop so that it wraps all the way around
the model
Press and hold ctrl- select the other line going
horizontally just beneath it and press loop again
Grab the Y axis and pull inwards to make it look more like a
handle shape
Press the red cube tool and click the shape to select the
whole shape then adjust it on the Y axis until you’re happy with the shape
Create a box over the top using the top wireframe view look
at how the box fits over the top of the handle
Select the handle and go to the align tool, click center on
both settings and apply to put the hammer head in the middle of the handle
Check Z position and select Maximum on both settings and
apply, the head should be at the top
If you go into polygon mode and select either side face of
the hammer then use the scale tool to make either end wider
When happy right click and convert the head to an editable poly
Select the two top edges- the 1st segment and the
3rd segment and then press Ring
Right click and select chamfer to get a hammer head shape-
the size will be dependent on the size of the head- I set mine to 0.66 and the
bottom option to around 2
Using polygon mode select each end of the head and right
click- select the small box next to Inset and pick an amount, usually 0.3 works
well- ensure that it is grouped by polygon and not by Group
In
this view (3D view) right click the word which says Realistic and click
consistent colours then go to Lighting and Shadows- untick shadows
Select the hammer head and open UVW editor
Go to polygon mode in the UV window
Select the middle polygon on the inverted face and press the
grow selection button which is a blue box with a little grey square in the
bottom left corner and a plus sign at the top right corner, this will select
everything in that face, even the outside edges.
In the max window go to projection and select the icon which
resembles a plane, then deselect the icon after to ensure that you can click
other things. Then move this to one side
in the UV editor window and do the same for the other face.
Draw a selection box around the remaining polys and select
the cylinder tool from projection- then click to the Y button under align
options
Select the faces individually (separate boxes) and reduce
the size of them with the scale tool
Right click and convert to an editable poly
Repeat the same process for the handle
With the handle selected click on attach under edit geometry
and then select the hammerhead; it should turn the same colour as the handle
Click attach again so that you don’t attach anything else
Convert to editable poly and unwrap UVW, then organise all
of the shapes so that they fit into the box, making the most out of the given
space
Tools- render the UVW template and put in 512, 512 for the
resolution, save it as sledgehammer template in JPEG format
Then open it up in Photoshop and pick some textures from the internet, place them on the different areas of the template, go back into Max and open up the material editor- ensure that its in the correct mode- go to maps- then diffuse colour and pick the bitmap which you did in photoshop- press the checkerboard with the lightbulb to see the texture


No comments:
Post a Comment